Single Object registration
In this example, we will see how to register one microscope in the Lab Instruments Collection. The same procedure should be followed to register any other Object in other Collections.
- Click on the Lab Instruments Collection folder in the main menu.
- Click the + in the main page
- Fill in the form
- Save

Alternatively:
- Select Create Object from the Operations drop down menu
- Select the relevant Object type, e.g. Instrument
- Fill in the form
- Save
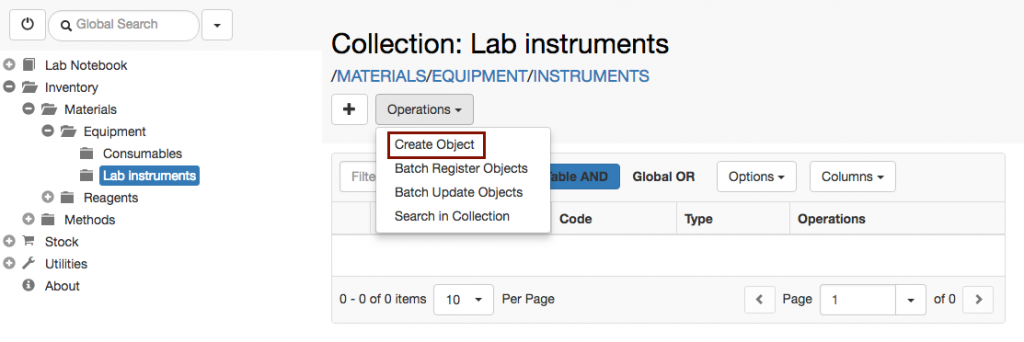
To edit the Object, click on the Edit icon in the Object form toolbar, as shown below.

Batch registration of Objects
To register several Objects of the same type from a file:
- Navigate to the relevant collection (e.g. Lab instruments)
- Select Batch Register Objects from the Operations drop-down menu
- Select the Object type (e.g. Instrument)
- Download the template file and fill in the relevant information
- Upload the file
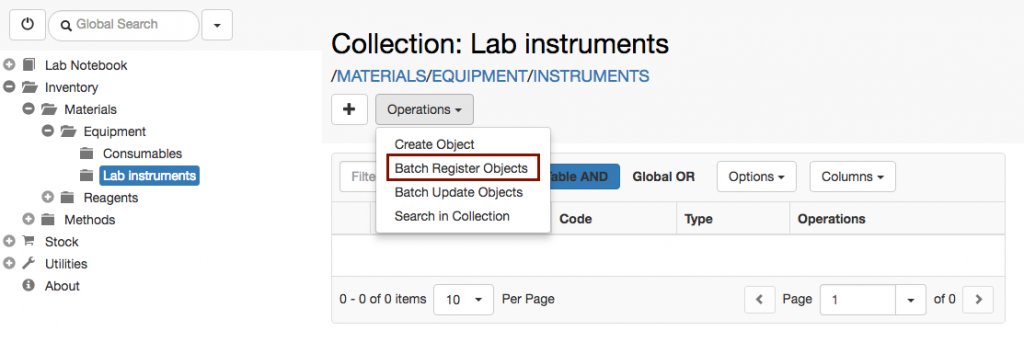
Rules to follow to fill in the template .tsv file
- Identifiers:
- Identifiers are given by /SPACE/PROJECT/OBJECT_CODE, e.g /MATERIALS/EQUIPMENT/INS1. Users can provide their own identifiers, or these can be automatically generated by openBIS.
- To have identifiers automatically generated by openBIS, completely remove the identifier column from the file.
- Lists. In fields that have lists to choose from (called Controlled Vocabularies), the code of the term needs to be entered. Term codes can be seen under Utilities -> Vocabulary Browser.
- Parents. Use the following syntax to enter parents: identifier1, identifier2, identifier3.
- Parents annotations. Use the following syntax to annotate parents: identifier:xxx;COMMENTS:xxxx\identifier:yyy;COMMENTS:yyyy. Where COMMENTS is the property used for the annotation in this case (to be replaced with the actual property used).
Batch update
To modify the value of one or more fields in several Objects simultaneously:
- Navigate to the relevant collection (e.g. Lab instruments).
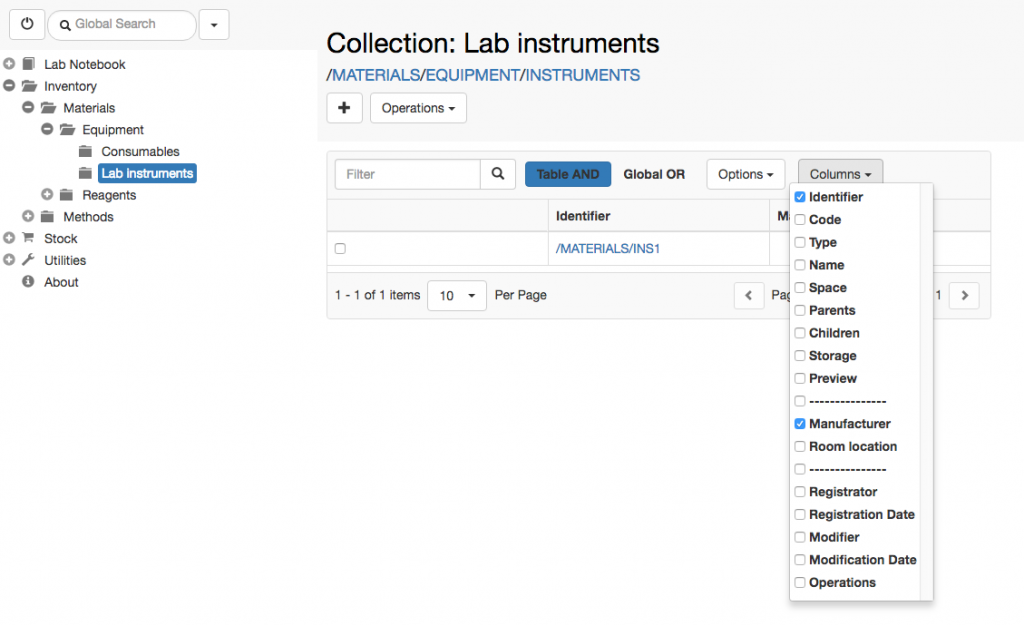
- From the Columns drop down menu select Identifier and the field(s) you want to update, as shown below.
3. Filter the table. You can enter the names or Object codes in the filter field and use the Global OR option to search. Please note that this is a global search, and it will likely return more results than needed. These can be removed afterwards from the exported file.
4. Export the Object table from the relevant Collection page, choosing the option Export visible columns with visible rows from the Operations drop down menu.
DO NOT export the table in plain text for batch update, otherwise all text formatting will be lost on update!
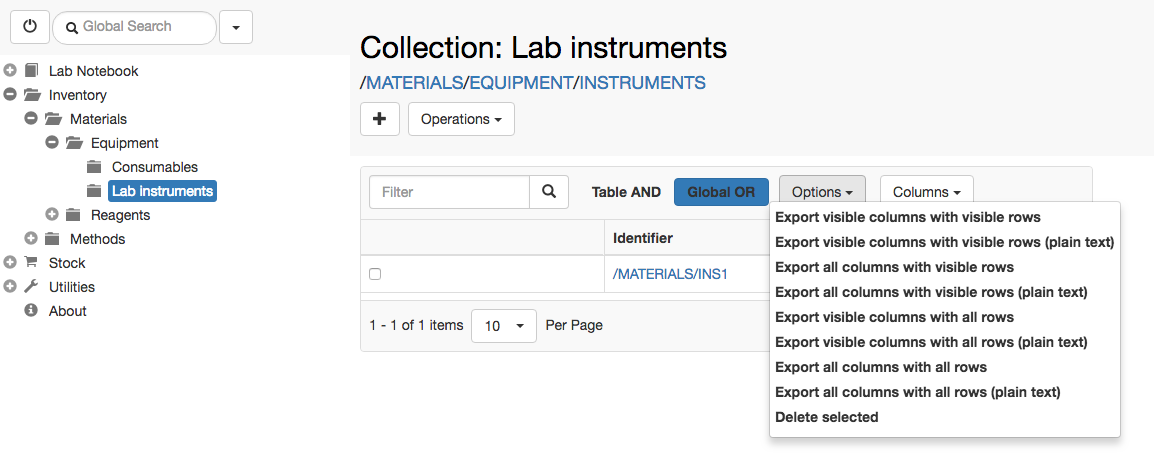
5. Remove any Object you do not want to update from the exported file.
6. Fill in or modify the fields to update in the exported file.
7. Select the Batch Update Objects option from the Operations dropdown menu in the Collection page
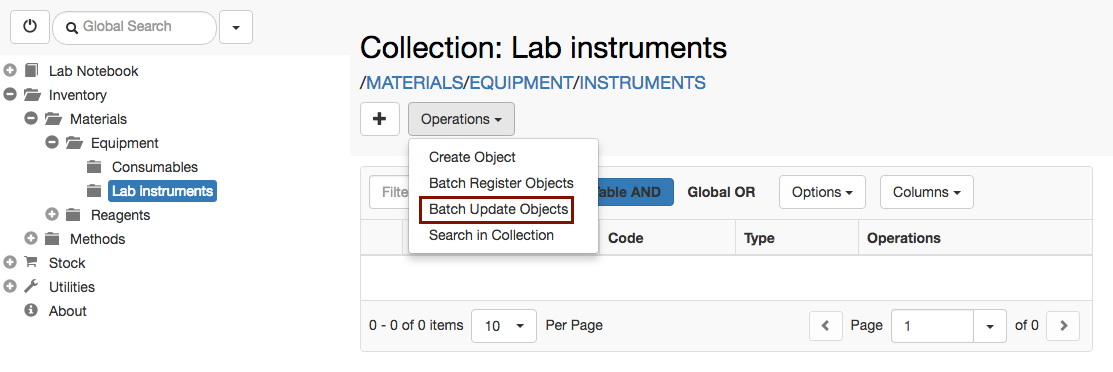
8. Select the relevant Object type, e.g. Instrument .
9. Upload the file modified before.
Copy Objects
To create a copy of an existing Object, use the copy button in the Object form toolbar:

When an Object is copied, the user has the option to link parents, copy children and copy the comments log.
Move Objects
To move an Object to a different Collection, use the move button in the Object form toolbar:


