Register users in ELN Interface
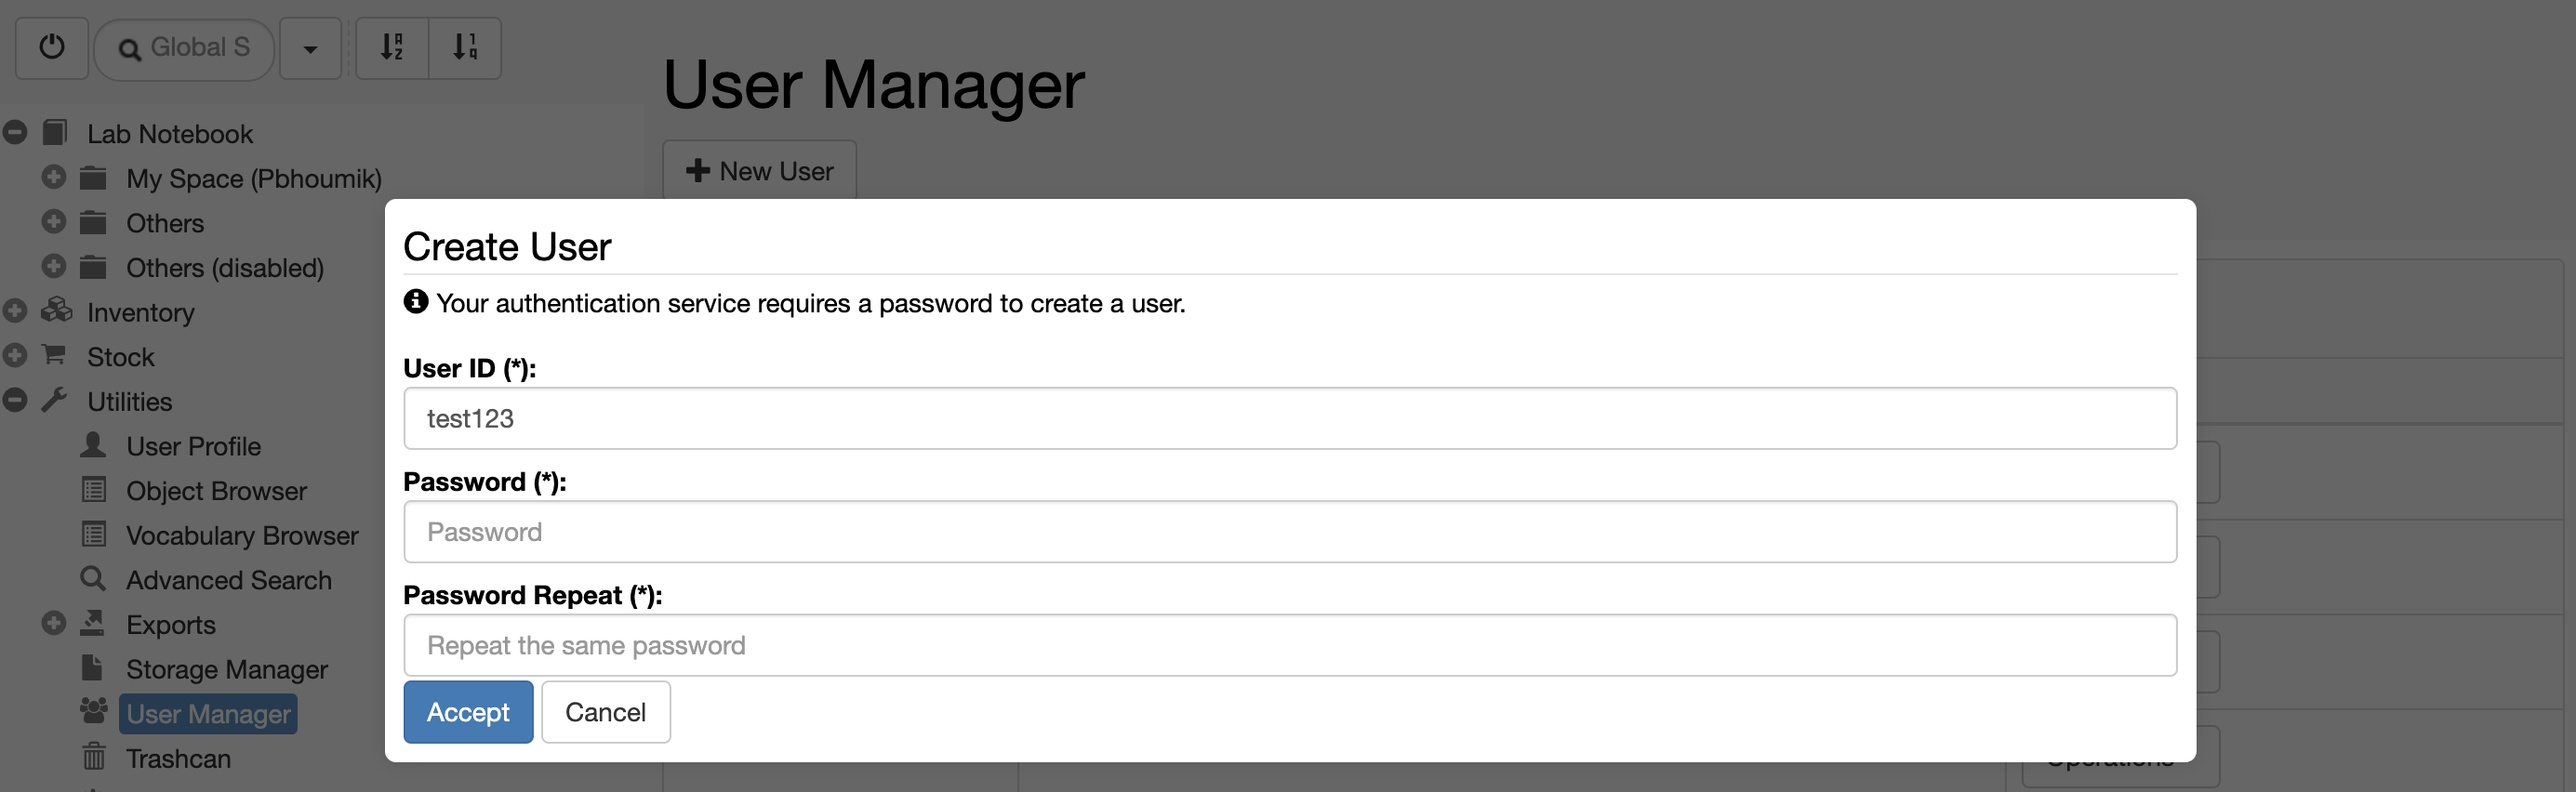
Users can only be added by someone with Instance admin role:
- Go to User Manager, under Utilities.
- Select New User.
- Provide a username: LDAP username for LDAP authentication, email for SSO authentication.
- For file-based authentication provide username and password. The password can later be changed by the user.

Default roles assigned in ELN
When a user is registered via the ELN interface, a Space (folder) with the name of the user is automatically created under the Lab Notebook main menu. The user is also assigned some default roles:
- Space admin of the Space created for him/her under the notebook.
- Space user of the Inventory Spaces (MATERIALS, METHODS by default), the STOCK_CATALOG and the STORAGE Spaces.
- Space Observer of the STOCK_ORDERS, ELN_SETTINGS and PUBLICATIONS Spaces.
Modification to default rights can be granted by an Instance admin from the admin UI, as explained below.
Overview of roles: https://openbis.ch/index.php/docs/admin-documentation/user-registration/openbis-roles/ .
Register users from the admin UI
When users are registered via the admin UI no default roles are assigned.
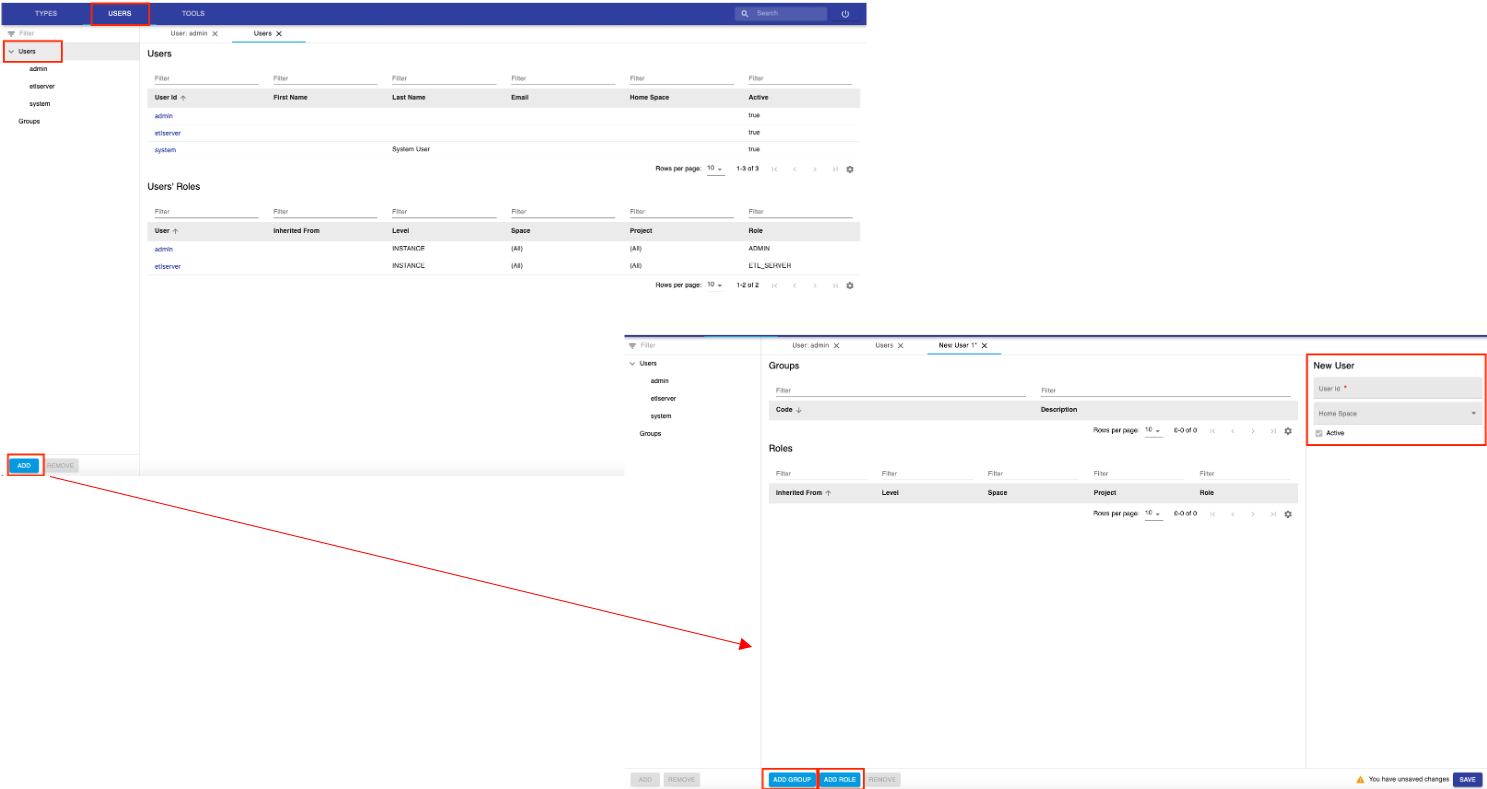
To register new users from the admin UI:
- go to the Users tab. The Users and Groups will show in the main menu on left had side.
- Click on Users in the menu: the Add button at the bottom of the menu will become active (blue)
- Click the Add button
- Enter the User Id. This is the LDAP username, when LDAP authentication is used, or the email address if SSO is used. Please note that file-based authentication (where username and password can be created) is not supported by the admin UI.
- Home space: this sets the default folder a user sees marked as My Space in the Lab Notebook.
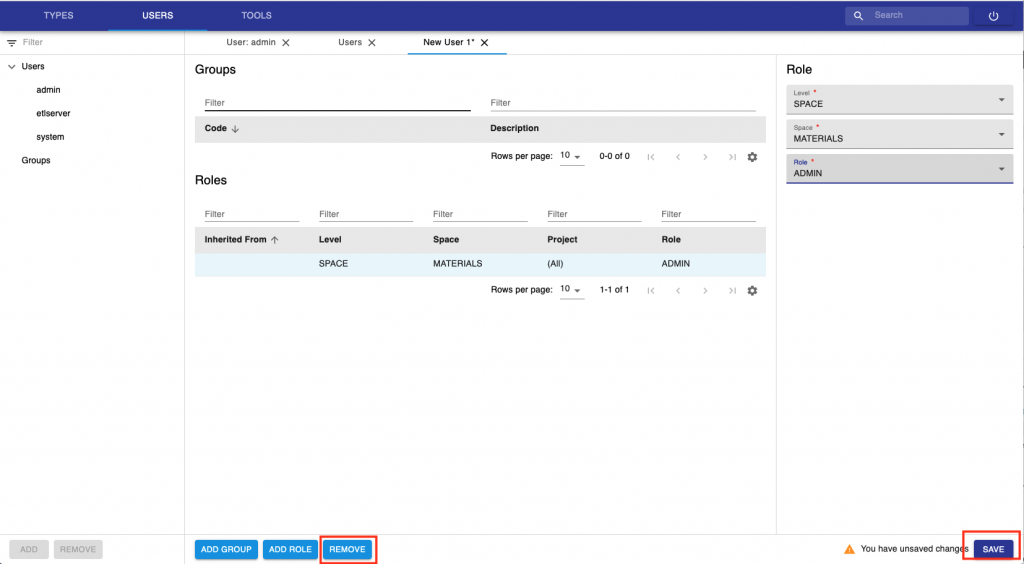
- Click the Add Role button at the bottom of the page to assign a role to the user.
- Click the Add Group button at the bottom of the page to assign a user to a group of users.
8. To assign a role to a user, first the Level needs to be selected (Instance, Space, Project) .
9.If level is Instance, you can directly select a role (Admin, Observer). If the level is Space or Project, you first need to select the Space or Project and then assign a Role.
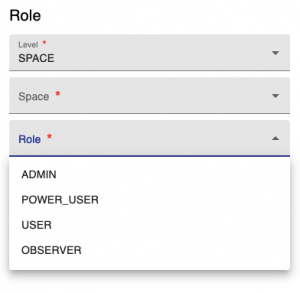
10. Multiple roles can be assigned to a user.
11. Roles can be removed from the Remove button at the bottom of the page.
12. After making the necessary changes, press the Save button.
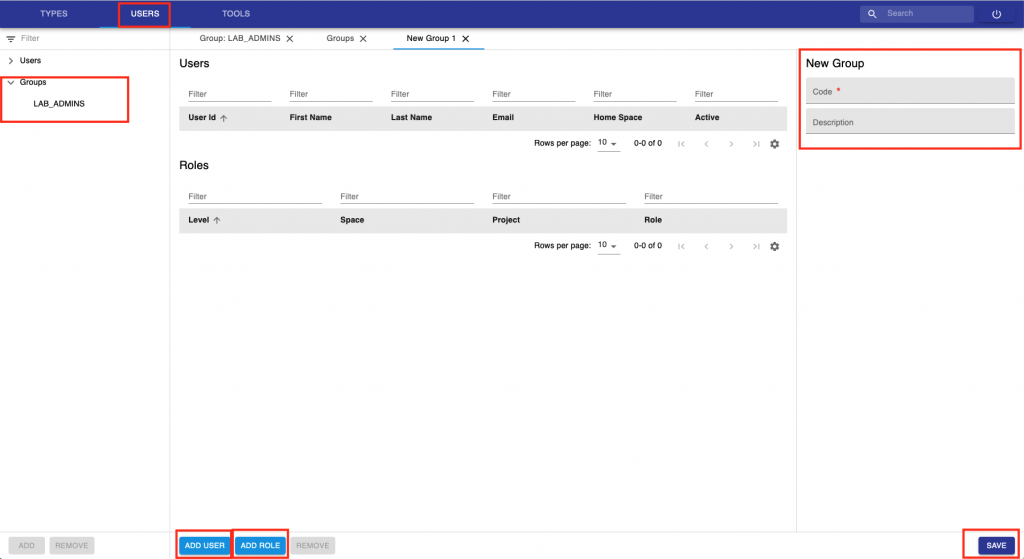
Create Users groups in admin UI
It is possible to create groups of users and assign rights to a group:
- go to the Users tab. The Users and Groups will show in the main menu on left had side.
- Click on Groups in the menu: the Add button at the bottom of the menu will become active (blue)
- Click the Add button
- Enter a Code for the group. This is the equivalent of a name, but Codes can only contain numbers, letters and the following symbols: . – _
- You can now assign registered users to the group and assign Roles as explained above.